

Most small shops price their pressing off gut feel and competitor menus. Nobody actually knows how long a lined wool blazer takes on the press versus a cotton dress shirt, so the markup gets smeared evenly across everything. The result is predictable: shirts subsidize suits, finishers burn out on silk blouses nobody charges enough for, and the owner can't explain why labor eats 40% of revenue some weeks and 28% other weeks.
The fix isn't a time-and-motion consultant with a clipboard. It's a repeatable way to sample press-minutes by garment class, calibrate your stopwatch sampling so the numbers mean something, and then wire those minutes into a labor-cost formula that sets your floor price. This article walks through exactly that — the sampling SOP, the machine quick checks that keep your samples honest, and the spreadsheet logic that converts minutes into pricing gates.
Why press-minute data falls apart before you even use it
The reason most shops don't have good press-minute benchmarks isn't laziness. It's that the few times they did time a presser, the numbers were garbage and they knew it.
-
The 4
45 blazer was heavily wrinkled from sitting in a hamper for a week
-
The 2
10 one was essentially a touch-up on a lightly worn garment
-
The press head wasn't at full temperature on the first one, so steam dwell ran long
If you sample without controlling for garment condition, machine state, and operator rhythm, you get numbers that can't be compared to each other. And a benchmark you can't compare against is just a story.
The second failure is averaging the wrong unit. A "blazer" isn't one garment class. An unlined linen blazer and a structured three-season wool blazer with shoulder pads are two completely different press jobs. Lump them together and your average sits in a no-man's-land that's wrong for both.
Define your garment classes before you touch a stopwatch
Benchmarks only work if the buckets are tight enough that garments inside a bucket behave the same way on the press. For most single-location shops, somewhere between 10 and 16 classes covers 90%+ of volume. Go finer than that and you're sampling forever; go coarser and your numbers lie.
Never lose track of an order again.
Pressesly helps you manage, track, and communicate every garment order seamlessly.
- Unified order management
- Real-time customer notifications
- Staff scheduling & workload tracking
No credit card required
A workable starter set:
| Garment Class | What belongs here | Why it's separate |
|---|---|---|
| Dress shirt – cotton | Standard laundered/pressed shirts | High volume, tight range |
| Dress shirt – blend/non-iron | Poly-cotton, wrinkle-resistant | Shorter dwell, different handling |
| Trousers – unlined | Chinos, cotton slacks | Fast, two-leg press |
| Trousers – lined/wool | Suit pants, pleated wool | Slower, crease precision |
| Blazer – unlined | Linen, soft summer jackets | No shoulder structure |
| Blazer – structured | Wool suit jackets, padded shoulders | Longest press, most touch-up |
| Skirt – simple | A-line, straight | Fast |
| Skirt – pleated | Accordion, knife pleats | Highly variable, slow |
| Dress – simple | Shift dresses, sheaths | Moderate |
| Dress – formal/detailed | Beading, chiffon, layers | Hand-finish heavy |
| Silk/delicate blouse | Silk, rayon, loose weave | Low heat, slow, risk of marks |
| Sweater/knit | Finished flat or steamed | Different station entirely |
Worth flagging: pleated skirts and detailed formalwear are where your press-minute variance hides. Those two classes can swing 3–4x inside the same bucket, which is a signal you may need to split them further or price them à la carte instead of by a flat benchmark.
The stopwatch-sampling calibration SOP
This is the part that makes the data trustworthy. You're not trying to time every garment — you're trying to collect a calibrated sample so your benchmark reflects normal conditions, not the worst or best day of the month.
The sampling rules
-
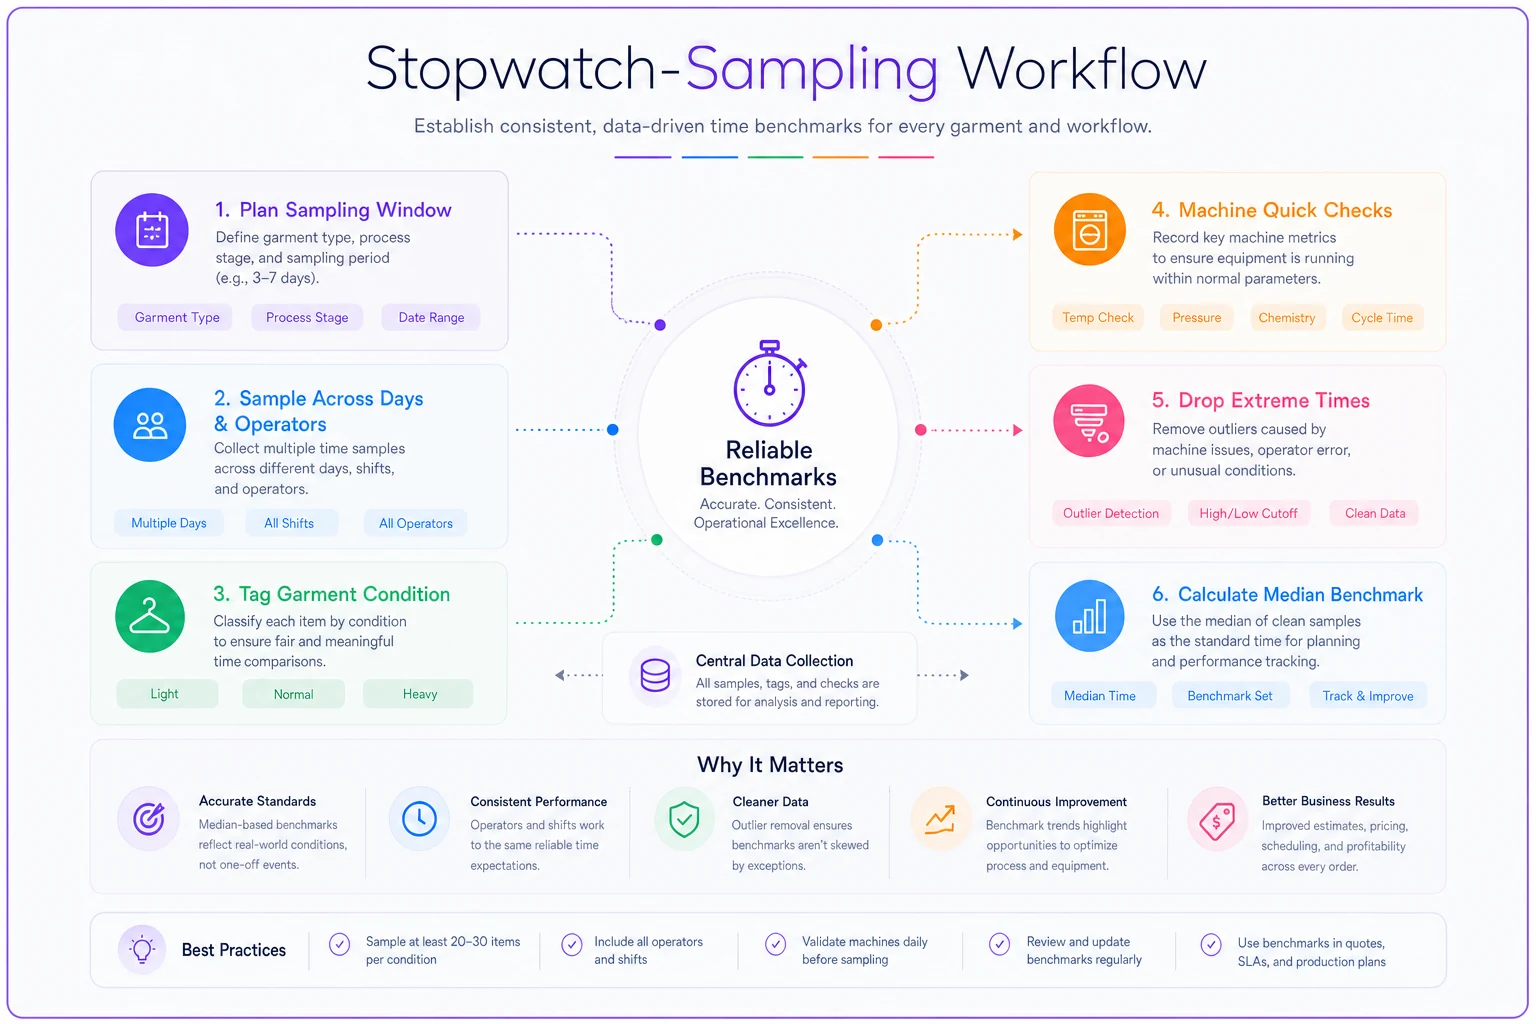
Sample across conditions, not in a block. Collect 8–12 observations per garment class, spread over at least 3 different days and 2 different operators. One finisher on one slow morning is not a benchmark.
-
Record from first contact to release. Start the clock when the garment hits the buck or form, stop when the finisher lets go and reaches for the next piece. Don't count walking to the rack — that's handling, measured separately.
-
Tag the condition. Mark each observation as Light, Normal, or Heavy wrinkle/soil. Keep only the Normal band for your base benchmark and use Light/Heavy to set surcharge triggers.
-
Note the machine state. Was the press at temperature? Was steam pressure in the green? An observation taken while the boiler was recovering gets flagged and excluded.
-
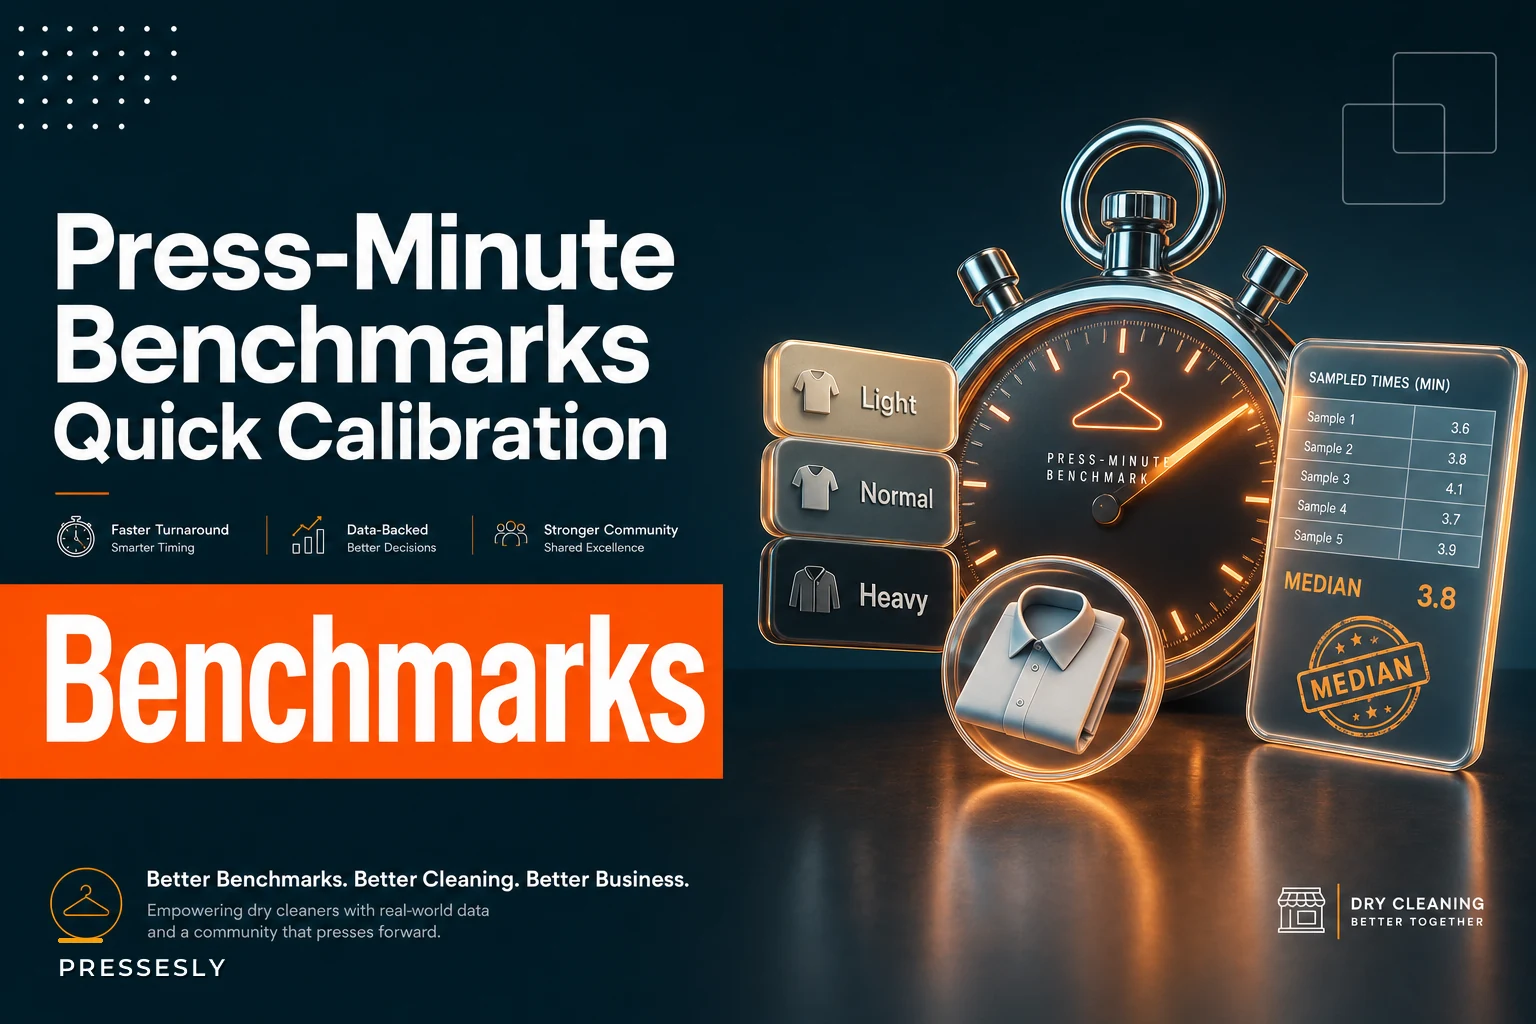
Drop the extremes before averaging. Throw out the single fastest and single slowest in each class, then take the median of what's left. Median beats mean here because one monster garment shouldn't drag your price up.
A sampling template you can print
Keep it to one row per observation. Clipboard, pencil, done.
``
Date | Operator | Class | Start | Stop | Minutes | Condition (L/N/H) | Machine OK? (Y/N) | Notes
``
A filled-in example for structured blazers might look like:
``
10/02 | Rosa   | Blazer-struct | 9:14:05 | 9:17:40 | 3:35 | N | Y | shoulder touch-up
10/02 | Rosa   | Blazer-struct | 9:22:10 | 9:28:55 | 6:45 | H | Y | heavy wrinkle, exclude-extreme
10/03 | Marcus | Blazer-struct | 2:01:00 | 2:04:20 | 3:20 | N | Y |
10/03 | Marcus | Blazer-struct | 2:40:30 | 2:43:10 | 2:40 | L | Y | light touch-up
``
From a run like this, your Normal-condition median for structured blazers might land around 3:25–3:40. That's your benchmark — not the 6:45 heavy outlier, not the 2:40 light touch-up.
Here's a quick workflow diagram of the sampling SOP.
How often to re-calibrate
-
Full re-sample twice a year, or after any press/boiler replacement.
-
Spot-check one class per week, 3 observations, to catch drift.
-
Trigger re-sample immediately if a class's weekly spot-check median moves more than ~20% from your benchmark. That usually means a machine problem or a new operator who needs coaching, not a real change in the garment.
Trigger re-sample immediately if a class's weekly spot-check median moves more than ~20% from your benchmark. That usually means a machine problem or a new operator who needs coaching, not a real change in the garment.
Machine setup quick checks (so you're timing the work, not the equipment)
This is the step that separates a real benchmark from noise. If steam pressure sags or the press head runs cold, your finisher does the same job in more time — and if you bake that into your price, you're charging customers for your maintenance problems.
-
Steam pressure sitting in the normal operating band, not recovering
-
Press head temperature at spec — a cold head means longer dwell and more passes
-
Vacuum/airflow pulling properly on the buck (weak vacuum = damp garments = re-press)
-
No water spitting from the steam gun or head (spitting causes marks and rework)
-
Form inflation holding pressure without sagging
-
Clean buck cover — a scorched or dirty cover slows the operator and risks marking
Run this 90-second check before any sampling session, and ideally at the start of every shift:
Run the 90-second check at shift start and log any recurring failures so you can spot chronic boiler or vacuum issues.
If any check fails, fix it before you sample. A session run on a struggling boiler will inflate every number and quietly raise your prices for no reason. Shops that stay on top of basic machine condition also tend to get cleaner, more stable press-minute data as a side benefit — not glamorous, but it matters.
Converting press-minutes into labor cost and pricing gates
Now the spreadsheet. The logic is simple once the minutes are clean.
Step 1 — Fully-loaded press-minute rate. Take the finisher's hourly wage, add payroll taxes and any benefits, then divide by 60. Example: a finisher at $19/hr fully loaded to about $23.50/hr → $23.50 ÷ 60 ≈ $0.39 per press-minute.
Step 2 — Base labor cost per garment class. Multiply the benchmark median minutes by your press-minute rate.
-
Cotton dress shirt at 1.3 min → 1.3 × $0.39 ≈ $0.51 labor
-
Structured blazer at 3.5 min → 3.5 × $0.39 ≈ $1.37 labor
-
Pleated skirt at 5.0 min → 5.0 × $0.39 ≈ $1.95 labor
Step 3 — Add the non-press load. Pressing is one station. Fold in a fixed per-garment allowance for tagging, bagging, inspection, and rack handling — many shops use something in the $0.40–$0.70 range per piece. Call it $0.55 here.
Step 4 — Set the pricing gate. Your price floor is where total cost (labor + solvent/consumables + overhead share) meets your target margin. The press-minute number gives you the piece of that floor that most shops get wrong.
A worked gate for the structured blazer:
| Component | Amount |
|---|---|
| Press labor (3.5 min × $0.39) | $1.37 |
| Handling/inspection/bag allowance | $0.55 |
| Solvent + consumables share | $0.95 |
| Overhead allocation per piece | $1.80 |
| Total cost | $4.67 |
| Floor price at ~60% gross margin | ~$11.70 |
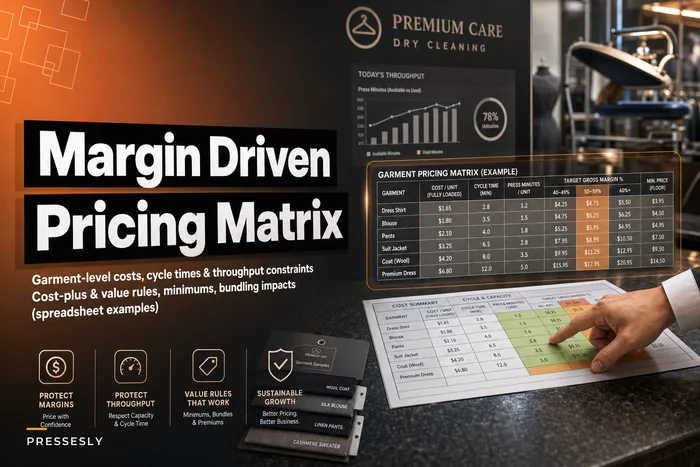
If your menu price for that blazer is sitting at $9.50, the press-minute data just told you you're underwater before overhead — and no promotion or route efficiency will fix a floor that's set wrong. This is exactly the kind of garment-level costing that keeps margins intact, and it pairs well with a broader garment-level costing and promo gate approach. For the full matrix logic on turning costs into menu prices, the margin-driven garment pricing matrix covers the cost-plus and value rules in depth.
Condition-based surcharge triggers
Remember those Light/Heavy condition tags? Use them. If your Heavy-condition median for a class runs more than ~40% above your Normal benchmark, that's a real cost you can recover with a "heavily soiled / set-in wrinkle" surcharge — flagged at intake, not sprung at pickup. Tie the trigger to the data, not to a mood.
Rostering triggers tied to throughput
Press-minutes aren't just a pricing tool — they're the cleanest capacity signal you have. Once you know the minutes per class, you can forecast press-station load from the order board instead of guessing.
The math: sum the press-minutes of everything in the queue, divide by available finisher-minutes for the day.
A quick example. Say your board shows:
-
120 cotton shirts × 1.3 = 156 min
-
25 structured blazers × 3.5 = 87.5 min
-
15 lined trousers × 2.2 = 33 min
-
10 pleated skirts × 5.0 = 50 min
Total ≈ 326 press-minutes of demand. One finisher over a 7-hour effective shift gives roughly 420 usable minutes. So one finisher covers it with buffer. But push shirt volume to 180 and add 10 more blazers, and you're over 500 minutes — a clear trigger to pull in a second presser or cut the same-day cutoff.
Simple rostering rules that work:
-
Below 75% of station capacity single finisher, normal cutoff.
-
75–95% single finisher, tighten the same-day cutoff and watch the delicate classes.
-
Over 95% roster a second presser or shift overflow to the next day — before you promise turnaround you can't hit.
This keeps staffing tied to actual work in the building rather than to how busy the front counter feels. It also connects directly to how you sequence jobs at intake; the intake-to-pickup workflow is where you capture the garment classes that feed this calculation in the first place.
A short real scenario
A two-presser neighborhood shop doing roughly 700–800 pieces a week had been running their menu off whatever the shop that closed down the street used years earlier. After sampling eight garment classes over about two weeks, two things jumped out: structured blazers were priced close to unlined ones despite taking nearly double the press-minutes, and pleated skirts were a flat $8 when the Normal-condition median alone put labor near $2 before anything else was factored in.
They didn't do a sweeping price hike. They nudged structured blazers up a couple dollars, set a pleated-skirt base with a per-pleat-range surcharge, and added a set-in-wrinkle flag at intake for the Heavy-condition pieces. Over the following couple of months the labor-to-revenue ratio on finishing tightened by several points, and the finishers stopped quietly dreading the formalwear rack because those jobs finally paid for the time they ate.
Nothing dramatic. Just prices that matched the minutes.
When this is worth doing — and when it isn't
Do this if: you've got mixed garment volume, finishing labor that feels unpredictable, or a menu you inherited and never rebuilt. The payoff is highest when formalwear and pleated/detailed pieces make up a meaningful share of your mix.
Skip the heavy version if: you're almost pure shirt-and-wash-fold with a narrow garment range. In that case, time two or three classes once, set your floor, and move on. The full calibration SOP is overkill for a menu with four lines.
Don't bother sampling at all if your machines aren't stable. Fix the boiler and the vacuum first — otherwise every number you collect is a measurement of your equipment problems, not your garments.
The bigger point
Press-minute benchmarks aren't about squeezing finishers or timing people like a factory floor. They're about knowing what each garment class actually costs in the one place small shops almost never measure — the press station — and letting that number set a price floor you can defend and a staffing plan you can trust.
Start with one garment class you suspect is underpriced. Time eight normal-condition pieces across a couple of days, check your machine state before each session, take the median, and run it through the labor-cost math. You'll either confirm your price is fine, or you'll find money that's been leaking out one blazer at a time.
Start with one garment class you suspect is underpriced. Time eight normal-condition pieces across a couple of days, check your machine state before each session, take the median, and run it through the labor-cost math. You'll either confirm your price is fine, or you'll find money that's been leaking out one blazer at a time.
Ready to elevate your dry cleaning operations?
Join hundreds of dry cleaners using Pressesly to save time, reduce errors, and enhance customer satisfaction.