
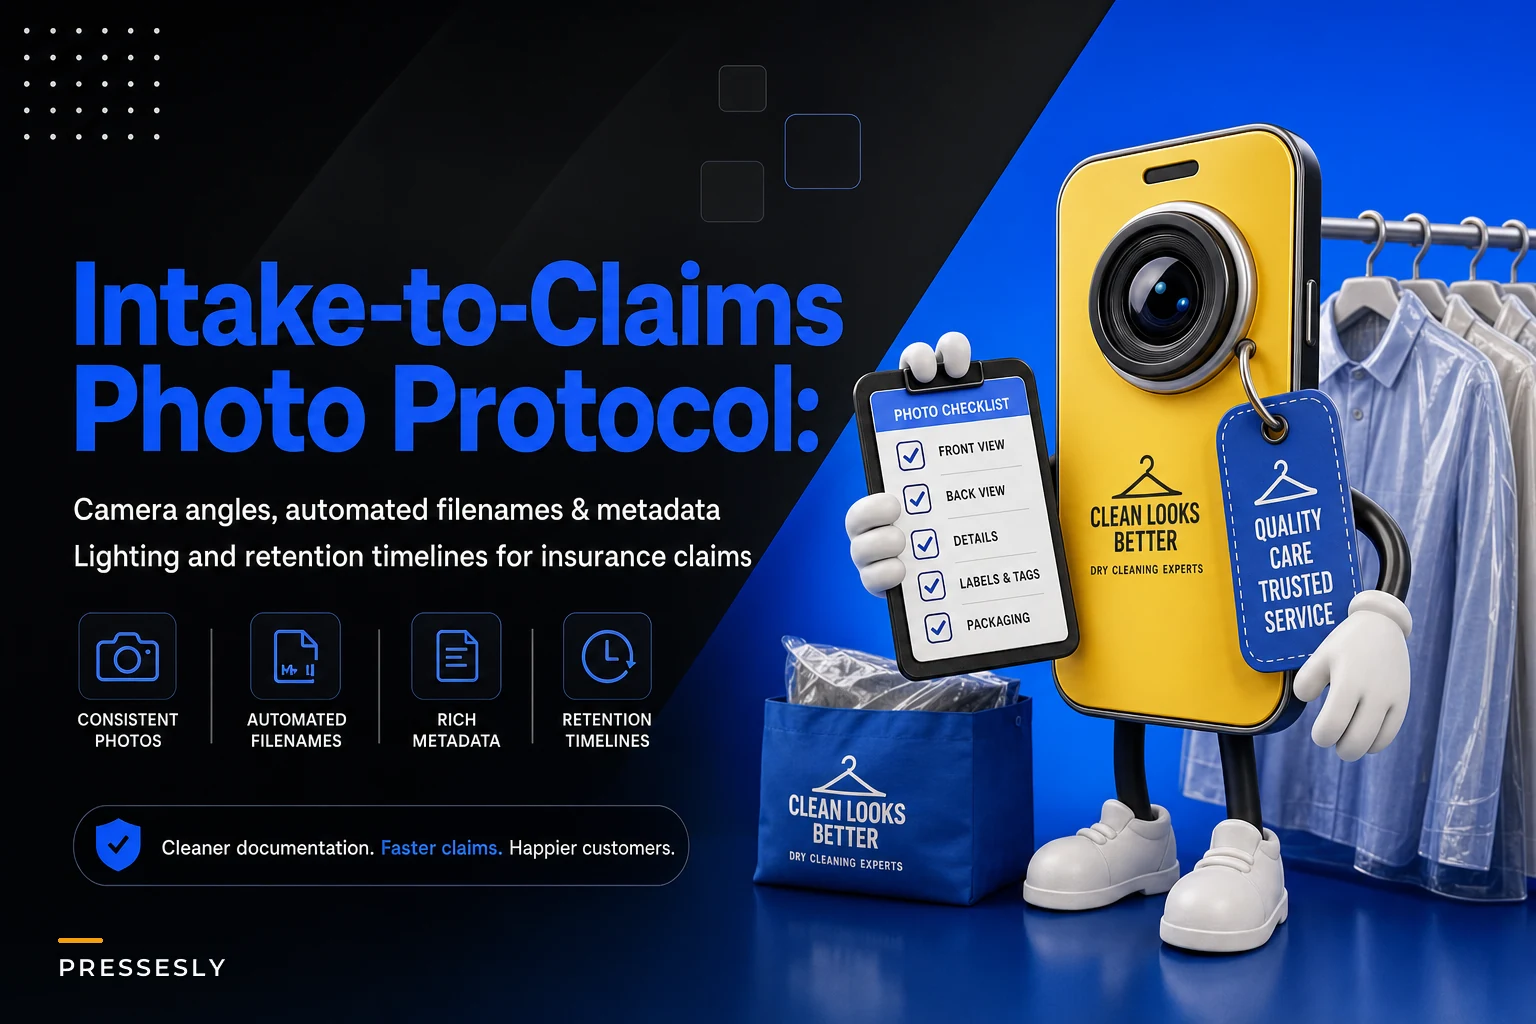

The difference between a winning insurance claim and a denied one often comes down to metadata. Not photo quality — the technical details: timestamp format, file structure, retention period. These are what determine whether your evidence holds up when a customer files a chargeback six months later or their insurer demands proof.
Most dry cleaners think documentation just means "take photos." But insurance adjusters and payment processors look for specific technical markers that prove authenticity. They check EXIF data for manipulation. They verify sequential filenames. They scrutinize angle consistency. Without these elements, even perfectly clear photos can become inadmissible.
Insurance adjusters and payment processors look for specific technical markers that prove authenticity.
The metadata problem that kills legitimate claims
A dry cleaner in Phoenix learned this the hard way when a customer's $4,800 Versace dress arrived with existing damage. Despite having intake photos showing pre-existing tears, their claim got rejected. The reason? Their phone camera had been stripping location data and timestamps to save storage. The insurance company argued the photos could have been taken anytime, anywhere.
This keeps happening because dry cleaners focus on capturing visible damage while ignoring the invisible technical layer that validates it. Insurance companies and card processors don't just want to see damage — they need to verify when, where, and how the photo was captured. Without proper metadata preservation, your visual evidence is legally worthless.
The specific technical requirements vary by processor and insurer, but certain standards appear consistently across disputes. Photos need original EXIF data intact. Filenames must follow a logical, unbroken sequence. Storage systems need audit trails with no gaps or deletions. Miss any of these and your claim gets flagged as potentially fraudulent — even when you're completely in the right.
Camera angles that satisfy insurance requirements
Insurance adjusters follow specific visual inspection protocols when reviewing damage claims. They look for three mandatory angles: full garment context, focused damage area, and measurement reference. Missing any one of them creates doubt about damage scope or authenticity.
Never lose track of an order again.
Pressesly helps you manage, track, and communicate every garment order seamlessly.
- Unified order management
- Real-time customer notifications
- Staff scheduling & workload tracking
No credit card required
The full garment shot establishes item identity and overall condition. Position the garment flat against a neutral background, capturing the entire piece including tags and labels. This wide shot proves you're documenting the specific item in question. Include a visible order tag or ticket number in frame.
The damage close-up requires different positioning. Place the camera 8–12 inches from the affected area, perpendicular to the fabric surface. Angle the light source at 45 degrees to create slight shadowing that reveals texture issues like pulls, pills, or abraded areas. Flat overhead lighting makes surface damage invisible in photos — which leads to claim denials for "lack of visible evidence."
The measurement reference shot addresses size disputes. Place a standard ruler or measurement card directly adjacent to the damage, in the same focal plane. Don't hold the ruler above or below the fabric — depth differences make accurate measurement impossible. Insurance companies specifically check for perspective manipulation, where rulers appear larger or smaller due to camera angle tricks.
Beyond these three core angles, certain damage types need additional documentation. Discoloration needs a white balance card in frame for color accuracy. Shrinkage requires before-and-after measurements using the same reference points. Missing items need photos of where attachments like buttons or decorations were originally located, with thread remnants or mounting holes clearly visible.
File naming that creates an unbreakable audit trail
Your file naming system is legal evidence during disputes. Random names like "IMG_4827.jpg" create gaps that insurance companies exploit — they argue missing sequence numbers indicate deleted evidence. Duplicate filenames from camera resets make your documentation timeline impossible to verify.
A defensible naming structure includes four elements: date stamp, ticket number, garment position, and photo type. Format it as YYYYMMDDTicketNumberGarmentPositionPhotoType.jpg. For example: "20240315T88472of3intake-damage.jpg" tells the complete story in the filename itself.
If your POS generates "ORD-2024-8847," don't shorten it; use the full ticket identifier in filenames.
The date stamp must use YYYYMMDD format, not MMDDYYYY. International insurance processors and payment networks standardize on year-first formatting to prevent confusion. Month-first dates create ambiguity — is 03/04/2024 March 4th or April 3rd? That ambiguity alone can invalidate evidence.
Ticket numbers should match your point-of-sale system exactly. Don't abbreviate them. If your POS generates "ORD-2024-8847," don't shorten it to "8847" in the filename. The full identifier links the photo to transaction records, creating a verifiable paper trail.
Garment position tracking prevents mix-ups in multi-item orders. Use "1of5," "2of5" format to show both the specific item and total order size. This numbering immediately reveals if photos are missing from a set, which eliminates insurance company claims about "selective documentation."
Photo type classification helps adjusters find relevant images quickly. Use consistent descriptors: "intake-front," "intake-back," "intake-damage," "intake-stain," "output-front," "output-resolved." Avoid vague descriptions like "weird-mark" or "problem-area" that create ambiguity about what you're documenting.
Lighting setups that reveal (not hide) damage evidence
Poor lighting makes damage invisible or exaggerated — both will kill an insurance claim. Overhead fluorescents wash out texture. Direct flash creates harsh shadows that hide detail. Natural window light shifts throughout the day, making before/after comparisons unreliable.
The most defensible setup uses two continuous LED panels at 45-degree angles from the garment, positioned 3–4 feet away. This creates even illumination without hot spots or shadows. Color temperature should stay consistent at 5000K–5500K (daylight balanced) across all documentation photos. Mixed lighting temperatures make discoloration claims nearly impossible to verify.
For intake stations, mount the lights on adjustable arms attached to the documentation table. This standardizes the angle and distance for every photo. Consistent lighting means surface textures appear the same across different garments and operators. When damage "appears" or "disappears" between photos due to lighting changes, insurance companies assume fraud.
The background matters as much as the lighting. Use an 18% gray backdrop for most garments — it provides neutral color reference without creating exposure problems. For very dark items, switch to a lighter gray. For whites and pastels, use a darker gray. Never use colored backgrounds that can reflect onto the garment and produce false discoloration claims.
Include a color calibration card in your first photo of each session. This gives adjusters a reference point for evaluating color accuracy claims. It doesn't need to appear in every shot, but should be present in at least one photo per lighting setup to prove consistent conditions.
Automated metadata preservation rules
Modern phones and cameras optimize photos by stripping metadata to save space. That optimization destroys your legal evidence. Every photo system needs explicit rules to preserve original capture data, regardless of storage costs.
Below is a simple workflow illustrating how metadata should flow from device to archive.
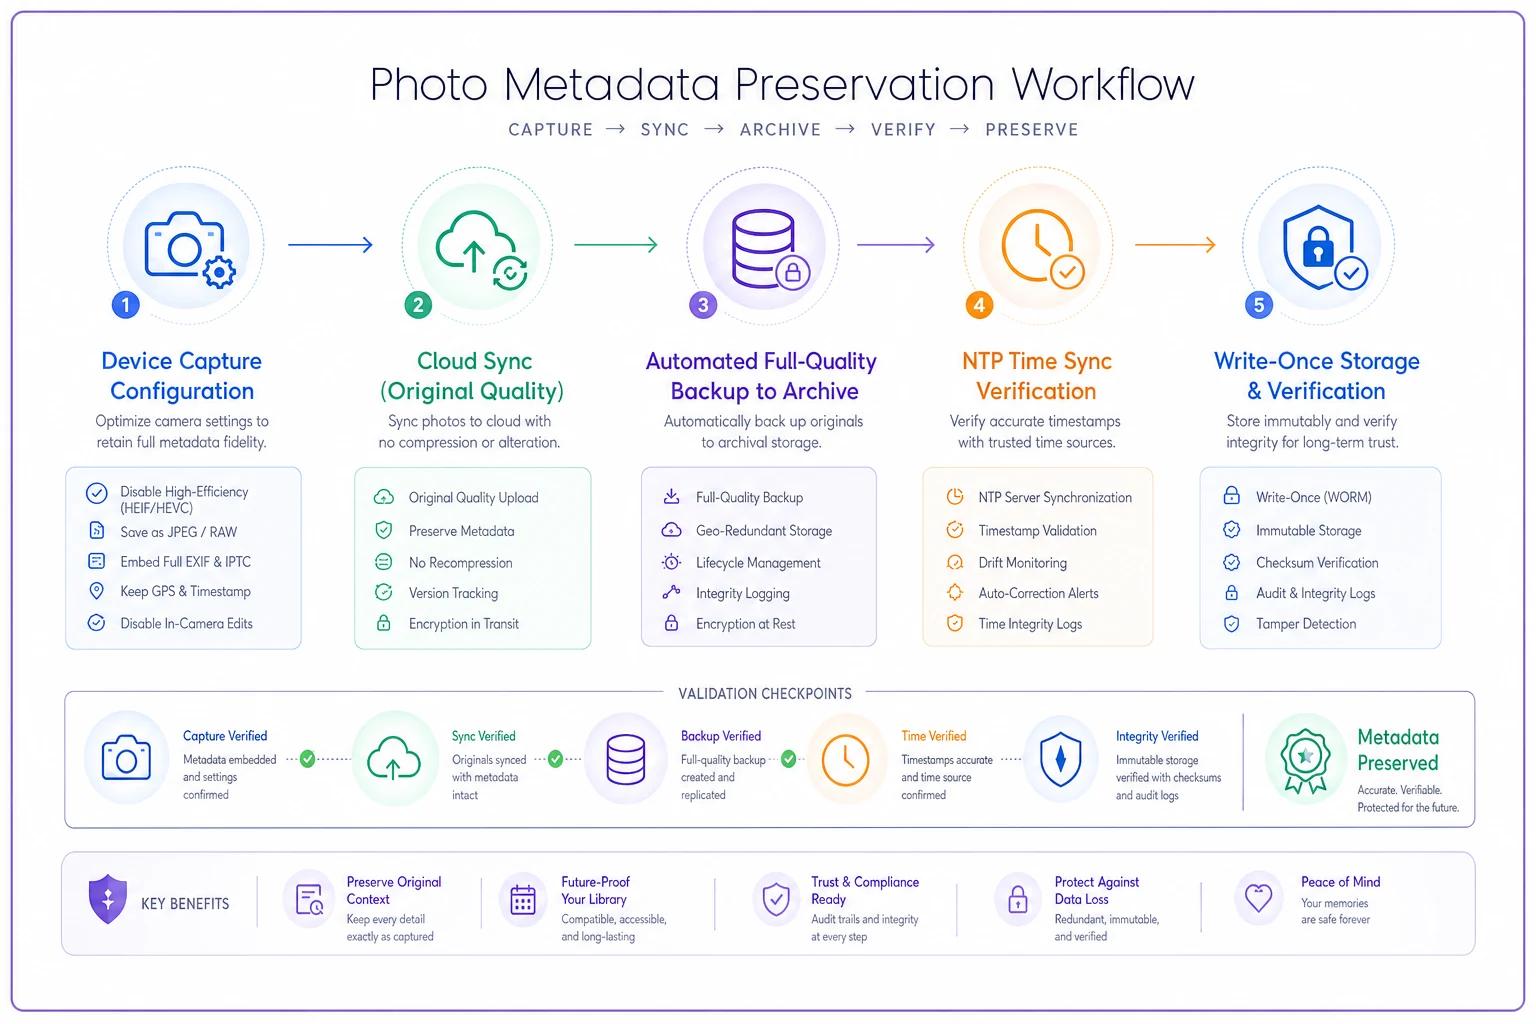
EXIF data preservation starts at the camera level. In iPhone settings, disable "High Efficiency" format and choose "Most Compatible." This keeps full metadata in standard JPEG format that insurance systems can actually read. Android devices need similar adjustments — look for storage optimization settings in the camera app and turn them off.
Cloud sync often strips metadata during upload. Google Photos, iCloud, and similar services compress images by default, removing critical timestamp and location data. Configure these services for "Original Quality" uploads, not "Storage Saver" or "Optimized." The extra storage cost is nothing compared to a denied claim.
Your photo evidence protocol should explicitly prohibit editing apps that strip metadata. Even basic cropping in many apps removes EXIF data entirely. If images need adjustment, use software that preserves metadata through edits — Adobe Lightroom handles this, as do most specialized evidence photography apps.
Set up automated backups that preserve the complete file. Don't rely on manual uploads where staff might accidentally save reduced versions. Many shops use Dropbox's camera upload feature configured for full quality retention — simple, but it works. The key is that photos move from device to archive without a human step that introduces error.
Timestamp accuracy is also critical evidence. Ensure all devices sync to network time protocol (NTP) servers, not manual clock settings. A camera clock that's off by a few hours can invalidate an entire documentation set when cross-referenced against POS transaction times.
Retention timelines that match legal requirements
Delete photos too early and you lose dispute evidence. Keep them too long and you risk privacy violations. The retention window depends on three factors: payment processing agreements, state regulations, and your insurance policy terms.
Credit card chargeback windows typically extend 120–180 days, but some premium cards allow disputes up to 540 days. Your photo retention must exceed the longest possible chargeback window for every payment type you accept. This means keeping intake and output photos for at least 18 months — not the 6 months many shops assume is sufficient.
State regulations add another layer. Some states classify dry cleaner photos as business records requiring 3–7 year retention. Others treat them as customer data subject to privacy laws. California, for example, requires explicit consent for photo retention beyond immediate business purposes. Check your state's specific requirements with a local attorney.
Insurance policies often bury documentation requirements in liability sections. Many require maintaining "complete transaction records" for the entire policy period plus any claim resolution period. This can extend retention requirements to 2–3 years for garments involved in any incident, even if no claim was ever filed.
Build retention rules into your intake documentation process from the start. Don't wait until storage becomes an issue to decide what to delete. Create automated archival rules: full-quality storage for 6 months, compressed archives for 6–24 months, then selective retention for high-value items after that.
The selective retention list should include all items over $500, designer pieces, wedding dresses, vintage clothing, and anything with documented pre-existing damage. These categories generate the majority of late disputes. Keeping their photos indefinitely costs almost nothing with modern storage pricing.
Storage architecture that proves chain of custody
How you store photos matters as much as what you photograph. Insurance companies look for evidence tampering by examining your storage structure. Gaps in folders, inconsistent naming, or modification dates that don't match creation dates all trigger fraud investigations.
Organize photos in nested folders by date, then ticket number: Year > Month > Day > TicketNumber. This creates a browseable timeline that makes missing documentation immediately obvious. When every day has a folder and every ticket has photos, there's no opening for claims about "selective evidence."
Each ticket folder should contain a predictable set of photos. If your protocol requires 6 intake angles, every folder needs exactly 6 intake photos. Missing photos suggest either protocol violations or evidence deletion. Adjusters specifically count expected photos against actual files present.
Implement write-once permissions on completed documentation. Once photos are captured and verified, lock the folder against modifications. This prevents accidental deletion and proves photos haven't been altered post-capture. Many shops accomplish this with basic folder permissions on protected archive drives.
The storage system needs redundancy without creating confusion. Keep primary copies on local servers for fast access, synchronized backups in cloud storage for disaster recovery, and periodic archives on external drives for long-term retention. But maintain a single source of truth — only one location should be considered authoritative for dispute resolution.
Version control matters when photos need enhancement for clarity. Never overwrite originals. Save enhanced versions with "-enhanced" filename suffixes, keeping originals untouched. This shows you're clarifying evidence, not manipulating it. Insurance companies often request both versions to verify what changed.
The real cost of inadequate photo evidence
A Seattle dry cleaner faced a $12,000 judgment after their photo evidence failed technical review. They had clear photos showing pre-existing damage on a wedding dress. But the images had been transferred through WhatsApp to save time — which stripped all metadata and compressed quality. The court ruled the photos inadmissible due to broken chain of custody.
Another shop in Miami lost a $3,200 designer jacket claim because their phone automatically deleted photos older than 90 days to free up space. By the time the customer filed a chargeback four months later, all evidence was gone. The auto-delete setting, meant to prevent storage warnings, cost them the claim and legal fees.
These aren't edge cases. Payment processors report that roughly 70–75% of dry cleaner dispute responses lack properly formatted evidence. The photos exist, but technical deficiencies make them legally worthless. Simple setting adjustments and protocol improvements would have prevented most of those losses.
Quick implementation checklist
The technical requirements feel overwhelming at first, but implementation happens in stages. Start with the highest-impact changes that prevent immediate losses, then add sophistication from there.
Week 1: Camera and device setup
-
Configure all devices for full metadata preservation
-
Disable automatic photo optimization
-
Set up consistent 5000K lighting at intake stations
-
Create standard angle reference cards for staff
Week 2: Naming and organization
-
Implement YYYYMMDD_TicketNumber naming format
-
Create folder structure templates
-
Train staff on complete documentation sets
-
Set up automated backup to cloud storage
Week 3: Retention and protection
-
Configure 18-month minimum retention
-
Enable write-protection on completed folders
-
Create high-value item tracking lists
-
Document retention policy for compliance
Month 2: Advanced validation
-
Add color calibration cards to documentation kits
-
Implement measurement references for damage photos
-
Create enhanced photo protocols for high-risk items
-
Set up periodic retention audits
| Phase | Actions |
|---|---|
| Week 1 | Configure all devices for full metadata preservation; Disable automatic photo optimization; Set up consistent 5000K lighting at intake stations; Create standard angle reference cards for staff |
| Week 2 | Implement YYYYMMDD_TicketNumber naming format; Create folder structure templates; Train staff on complete documentation sets; Set up automated backup to cloud storage |
| Week 3 | Configure 18-month minimum retention; Enable write-protection on completed folders; Create high-value item tracking lists; Document retention policy for compliance |
| Month 2 | Add color calibration cards to documentation kits; Implement measurement references for damage photos; Create enhanced photo protocols for high-risk items; Set up periodic retention audits |
Most shops see immediate improvements in dispute outcomes after implementing just the basic naming convention and metadata preservation. The advanced techniques matter for high-value claims, but proper file handling alone prevents the majority of documentation rejections.
Software systems that automate compliance
Manual photo management breaks down as volume grows. Staff forget naming conventions during busy periods. Photos get saved to wrong folders. Metadata gets accidentally stripped during transfers. These human errors create evidence gaps that insurance companies exploit.
Modern operational software automates the entire photo evidence chain. When properly configured, these systems capture photos directly from devices, apply consistent naming rules, preserve all metadata, organize storage hierarchically, and enforce retention policies automatically — removing human error from evidence handling.
The automation particularly helps with quality control workflows where photos need to match specific inspection points. Instead of relying on staff to remember which angles to capture, the software guides them through required shots and won't let them proceed until documentation is complete. That forced completion eliminates the "forgot to photograph" problem during disputes.
AI-powered features can also detect documentation gaps before they become problems. The system recognizes when expected photos are missing, when lighting conditions shift significantly, or when metadata appears corrupted — giving you a chance to fix evidence issues before a customer ever raises a complaint.
Integration with your point-of-sale system keeps naming consistent. The software pulls ticket numbers directly from transactions, eliminating transcription errors that break the evidence chain. When every photo automatically links to its transaction record, insurance companies can't reasonably claim documentation doesn't match the disputed item.
Your photo evidence protocol determines whether you win or lose disputes — and the visible damage matters less than the invisible technical layer underneath it. Metadata preservation, naming consistency, proper retention, and storage architecture are what insurance companies and payment processors check first. Even clear photos get rejected when they fail compliance checks.
Implementation feels complex initially, but becomes routine once established. Proper device configuration, consistent naming rules, and structured storage prevent most documentation failures. Automated retention policies and chain-of-custody protections handle the rest.
Every shop processing valuable garments needs these protocols. The investment in proper documentation infrastructure pays for itself with the first prevented loss. More importantly, solid evidence changes the entire dispute dynamic — insurance companies stop questioning your claims when your documentation consistently meets their technical requirements.
Start with the basics: preserve metadata, use logical filenames, maintain proper retention periods. These changes alone will immediately improve your dispute success rate. Then layer in calibrated lighting and automated compliance as your operation grows. The goal isn't perfect documentation of everything — it's defensible evidence for the claims that matter.
Ready to elevate your dry cleaning operations?
Join hundreds of dry cleaners using Pressesly to save time, reduce errors, and enhance customer satisfaction.